# Creating a View

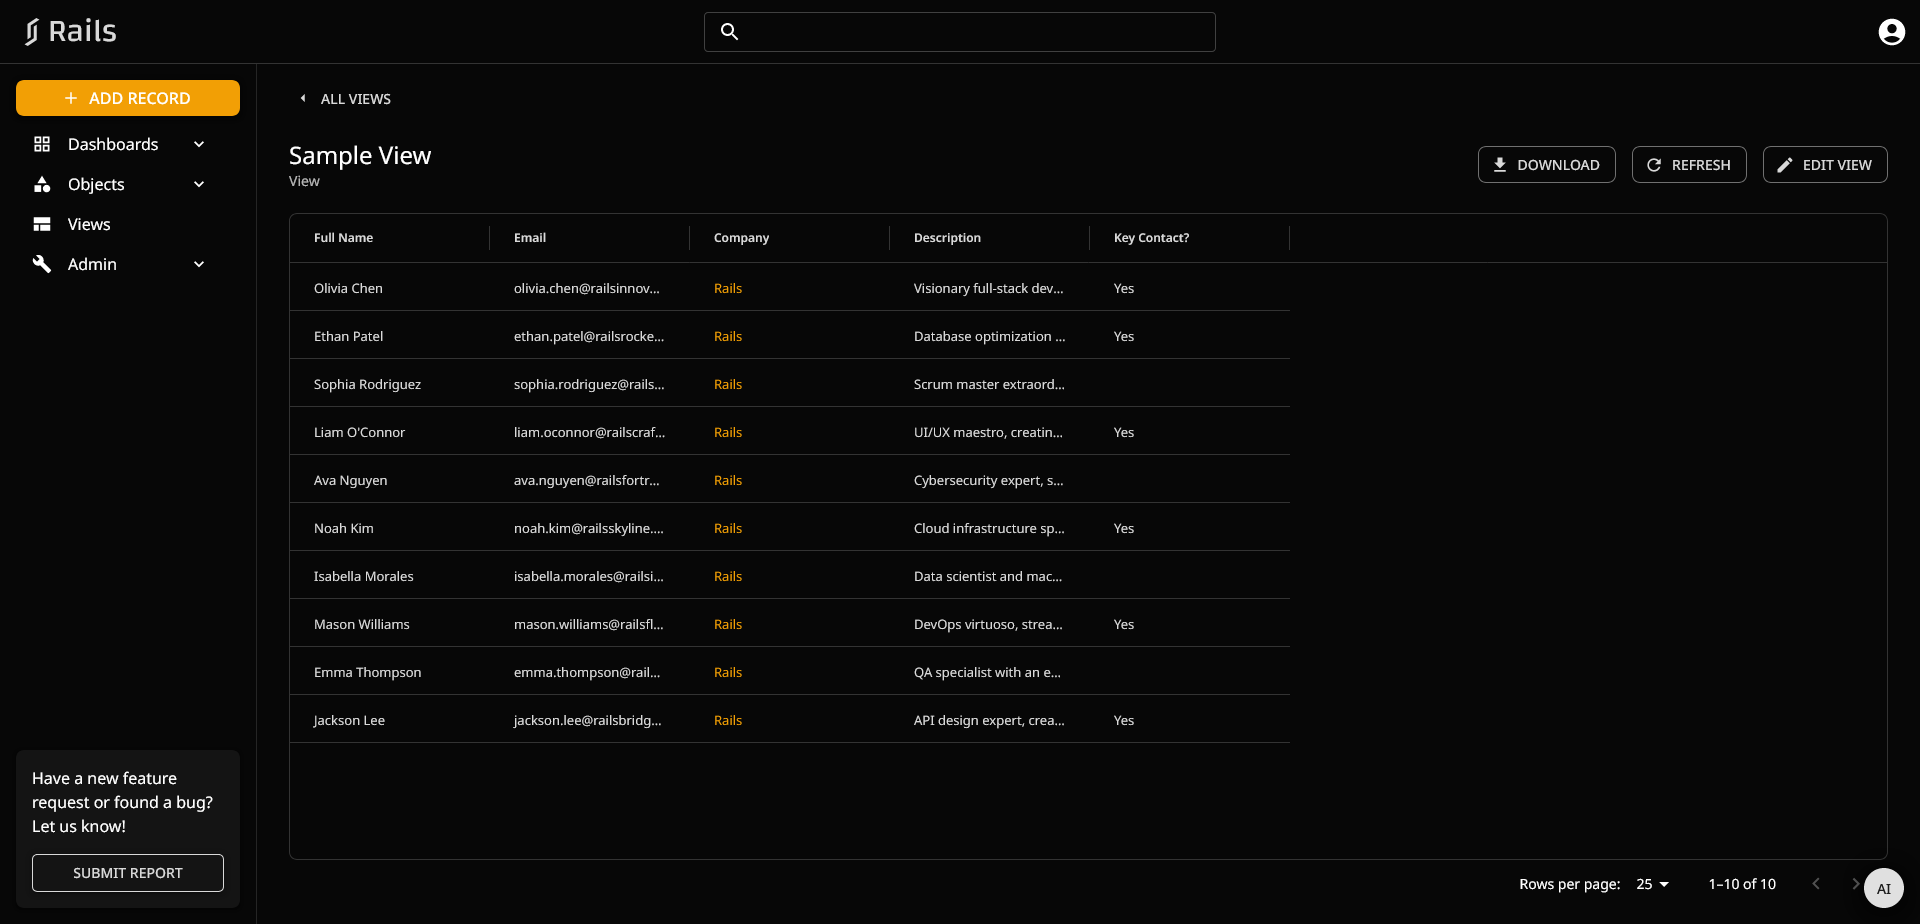
Understanding how Views work is critical to creating your Custom CRM. On a basic level, Views allow you to create custom tables as seen below:

<figure><img src="https://878880083-files.gitbook.io/~/files/v0/b/gitbook-x-prod.appspot.com/o/spaces%2FAIm7gKD7NLcZxCtbrbmz%2Fuploads%2FDHv7TdUkiRf4MRIMQrkk%2FScreenshot%202024-08-05%20at%2018-11-25%20Rails.png?alt=media&#x26;token=51974a45-4b5e-4ccc-8e40-47120dc89c29" alt=""><figcaption></figcaption></figure>

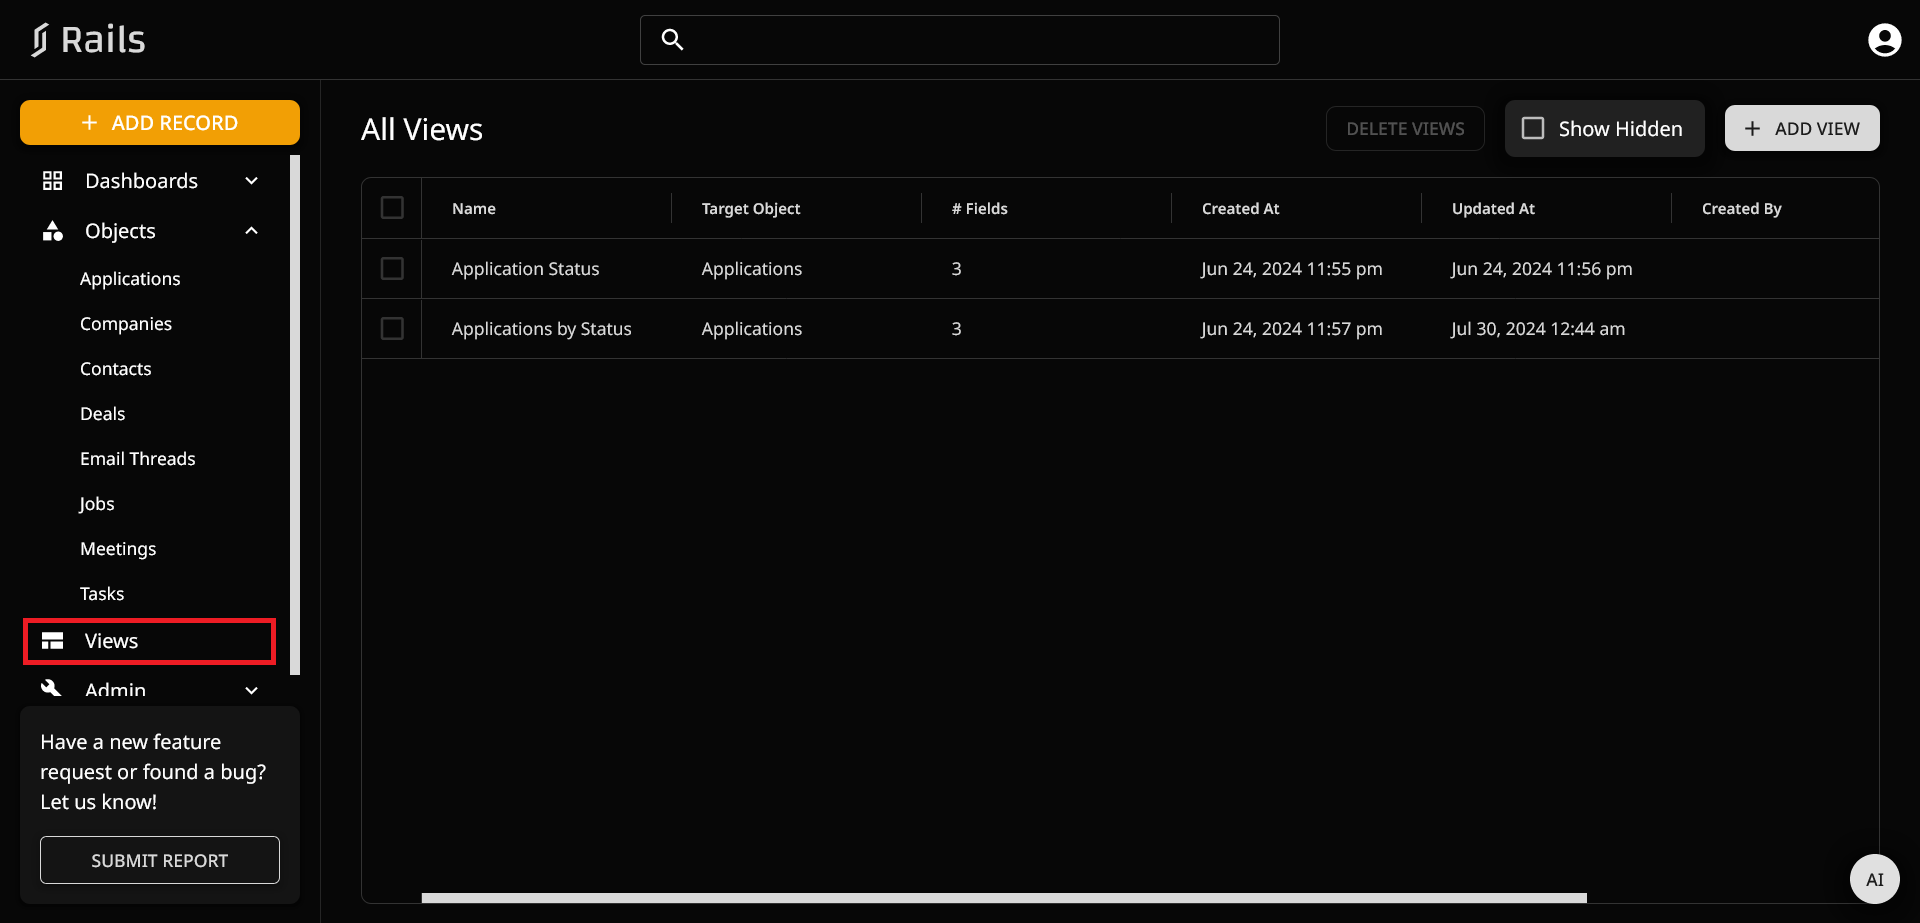
To get started, navigate and click onto the Views section on the left hand bar. The below page should be presented:

<figure><img src="https://878880083-files.gitbook.io/~/files/v0/b/gitbook-x-prod.appspot.com/o/spaces%2FAIm7gKD7NLcZxCtbrbmz%2Fuploads%2FQgeyKBKDHmHhpMCmvYXW%2FScreenshot%202024-08-05%20at%2017-28-26%20Rails.png?alt=media&#x26;token=db4ef6b4-b207-4d40-8551-b35a8ca93c48" alt=""><figcaption><p>Views Page</p></figcaption></figure>

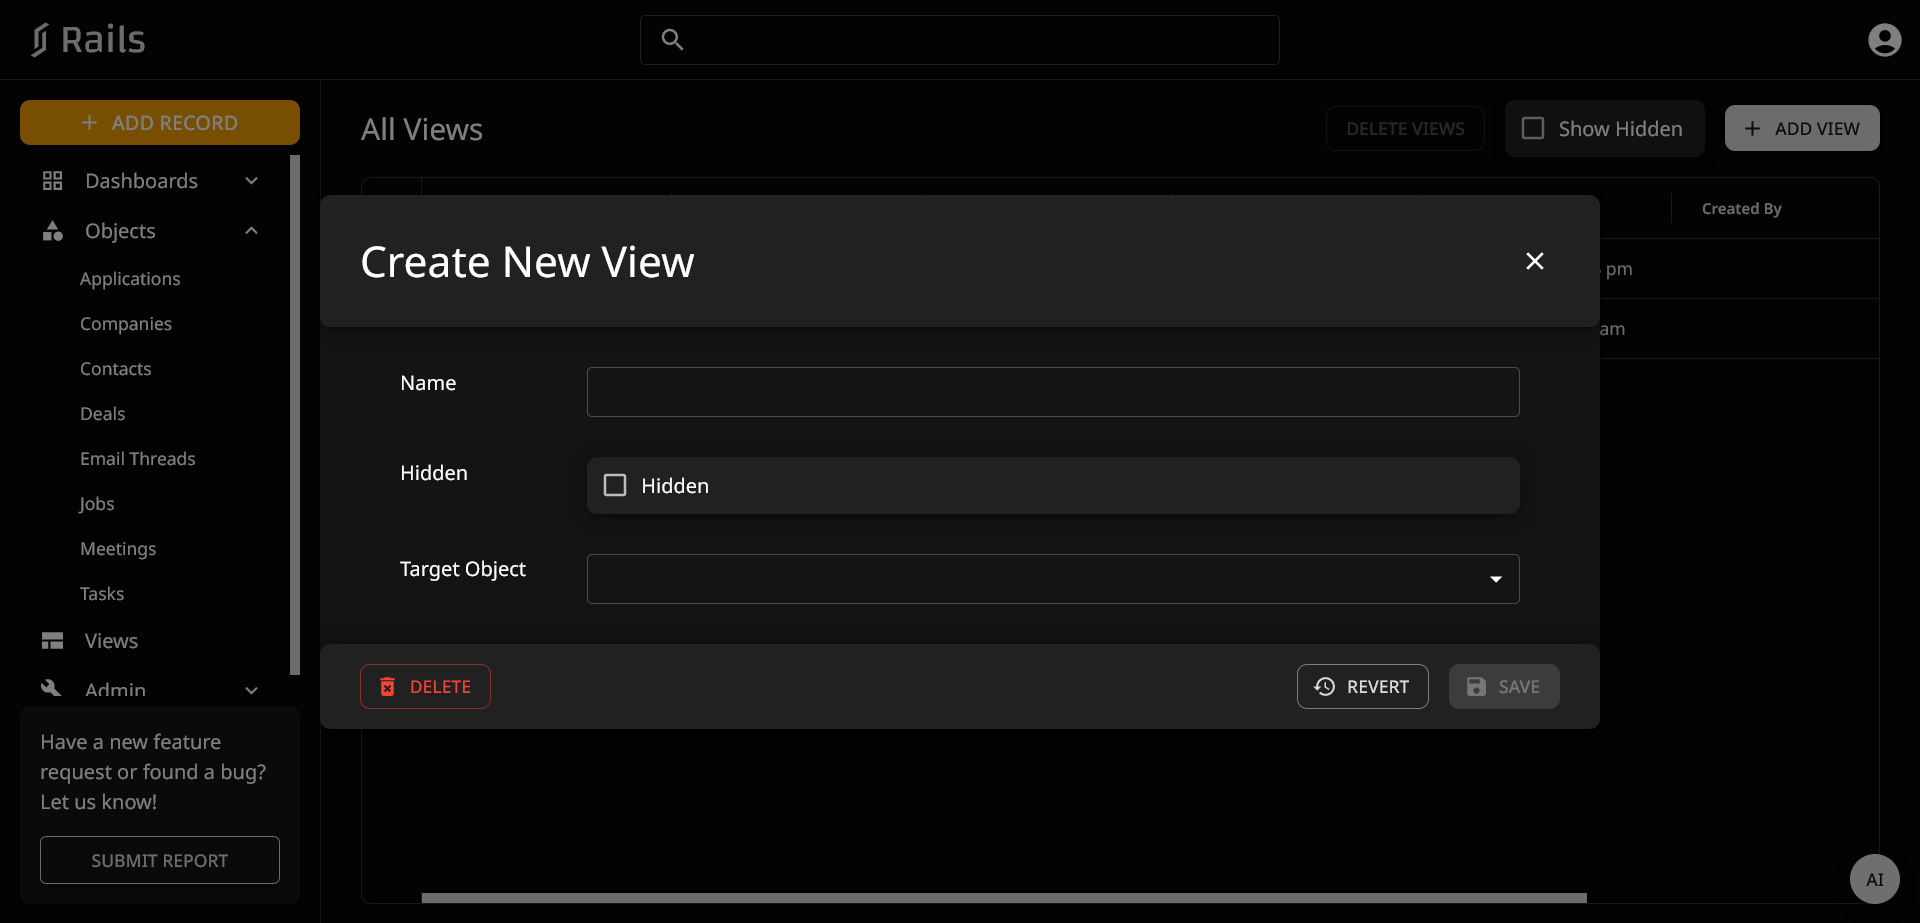
To create a new view, press the Add View button on the top right hand corner of the above screenshot. This will then take us to the following page:

<figure><img src="https://878880083-files.gitbook.io/~/files/v0/b/gitbook-x-prod.appspot.com/o/spaces%2FAIm7gKD7NLcZxCtbrbmz%2Fuploads%2FZtPD7gliVPShe9kZrDJJ%2FScreenshot%202024-08-05%20at%2017-38-52%20Rails.png?alt=media&#x26;token=9381f989-ea50-4d7d-91d5-22a4ecbe565f" alt=""><figcaption><p>New View Navigation</p></figcaption></figure>

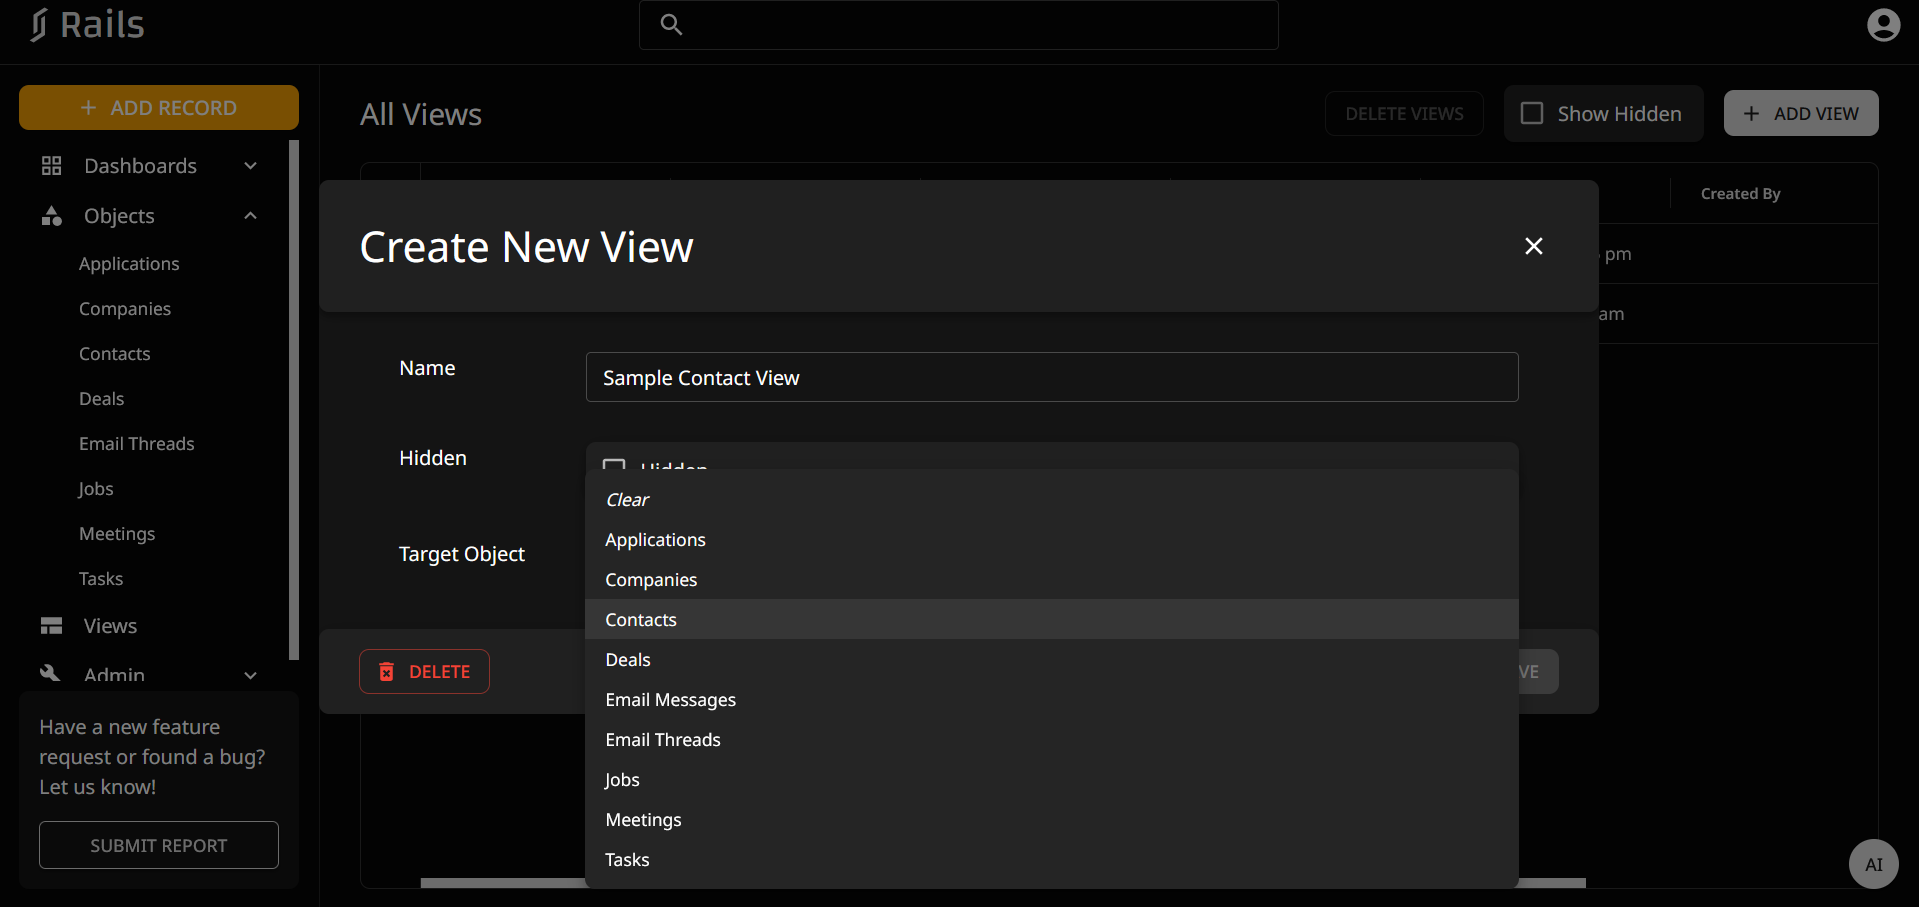
To start, let's create a sample view that looks at all of our Contacts. Let's name the view Sample Contact View. Furthermore, let's keep the Hidden unchecked and select the Contacts option under Target Object as seen below:

<figure><img src="https://878880083-files.gitbook.io/~/files/v0/b/gitbook-x-prod.appspot.com/o/spaces%2FAIm7gKD7NLcZxCtbrbmz%2Fuploads%2FJ4B4QKBIOHyzBgqEKp64%2Fcreatenewview2.png?alt=media&#x26;token=3df6cb25-33ca-4d27-8c01-d752d3a79be1" alt=""><figcaption><p>Selecting a Target Object</p></figcaption></figure>

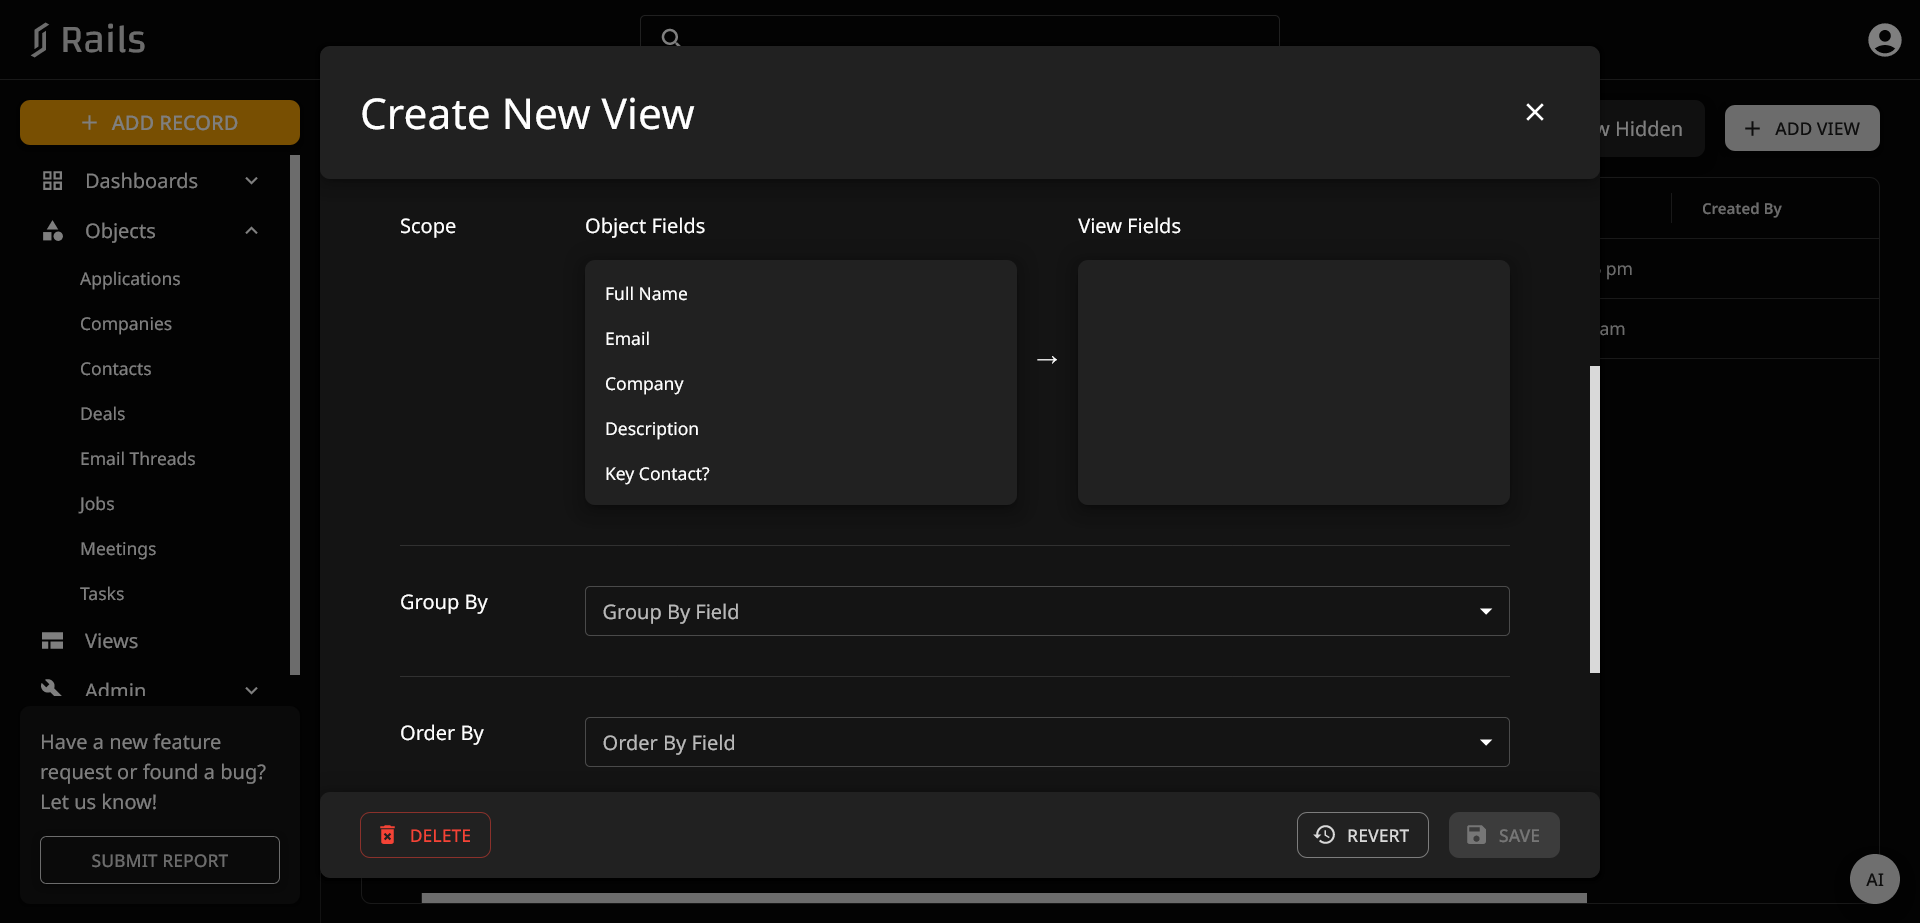
After selecting a Target Object, you should now be presented with the following screen:

<figure><img src="https://878880083-files.gitbook.io/~/files/v0/b/gitbook-x-prod.appspot.com/o/spaces%2FAIm7gKD7NLcZxCtbrbmz%2Fuploads%2Fiy4hyyLMwcvjfs5bQsB0%2FScreenshot%202024-08-05%20at%2017-48-58%20Rails.png?alt=media&#x26;token=275ae43b-337d-458d-a06c-b42fa373a62f" alt=""><figcaption><p>Scope</p></figcaption></figure>

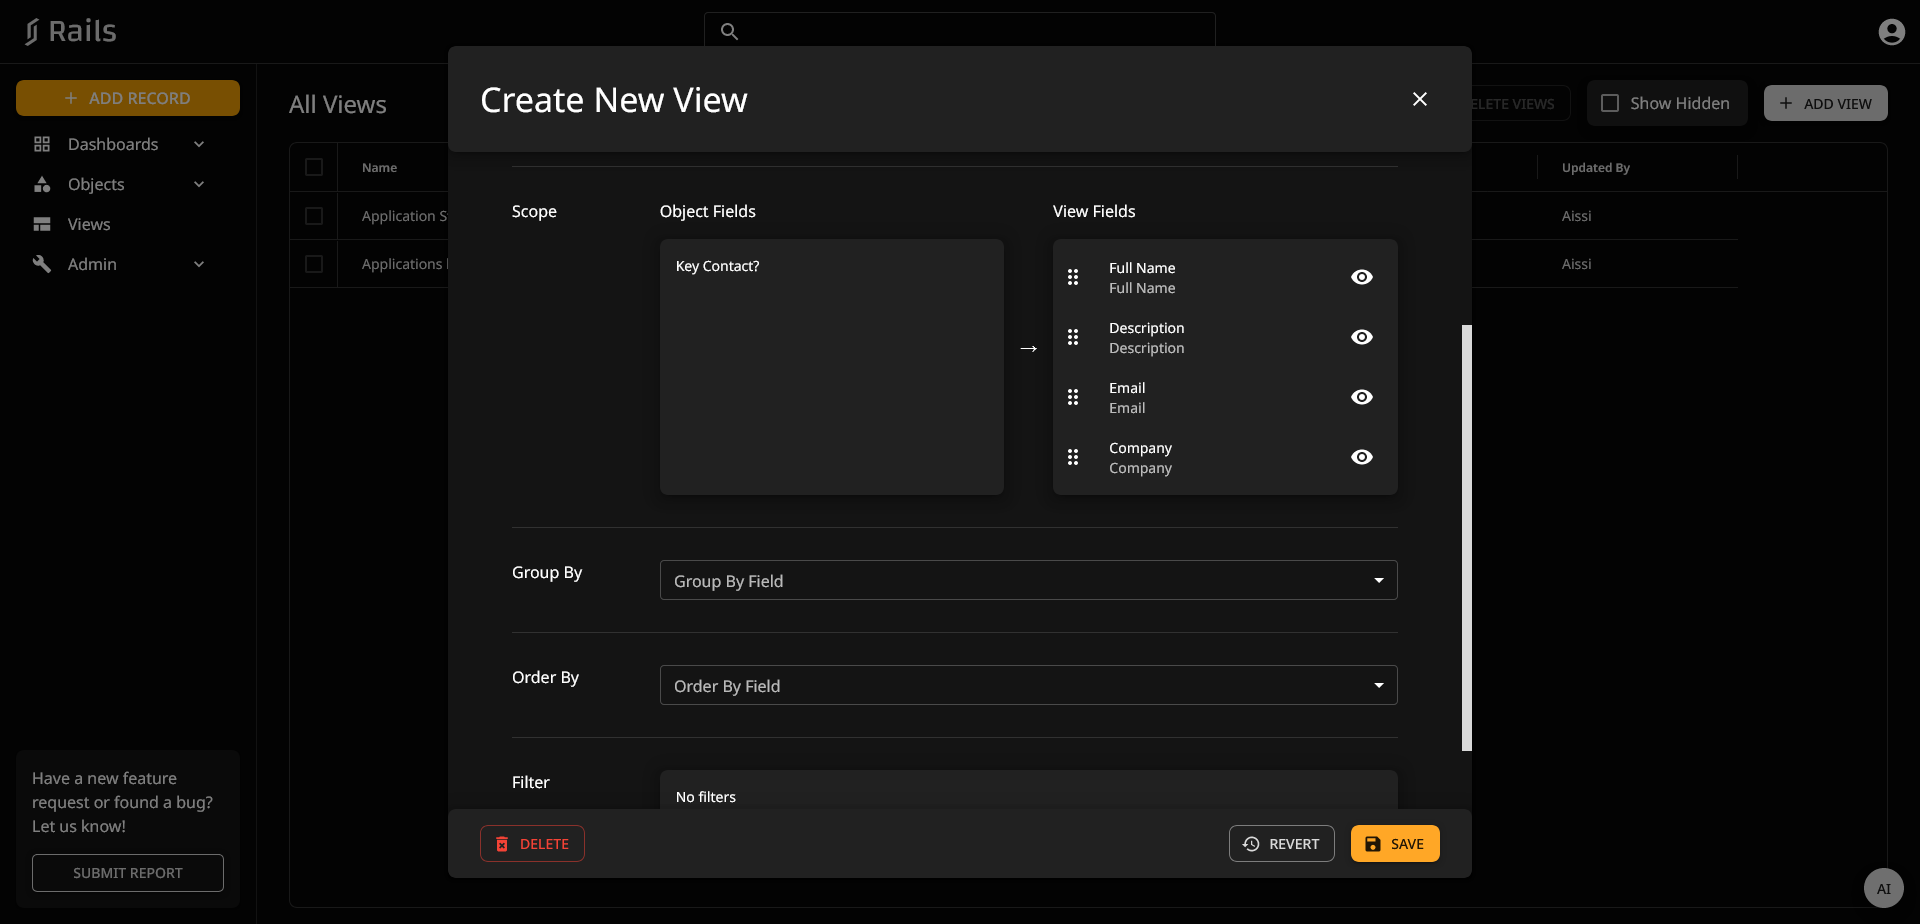
To add columns to our table, drag the fields from the left-hand column to the right-hand side. Feel free to rearrange the order of these fields by drag and dropping them above or below each other on the right hand column.&#x20;

<figure><img src="https://878880083-files.gitbook.io/~/files/v0/b/gitbook-x-prod.appspot.com/o/spaces%2FAIm7gKD7NLcZxCtbrbmz%2Fuploads%2FKMAPsFNpWM2e7BPoJama%2FScreenshot%202024-08-05%20at%2018-14-35%20Rails.png?alt=media&#x26;token=1db03611-f891-46ab-8f34-b0b2c80772c8" alt=""><figcaption><p>Moving Fields to the Right Hand Column</p></figcaption></figure>

For now, let's ignore the Group By field as this will be used and explained in more detail in the Widgets section.&#x20;

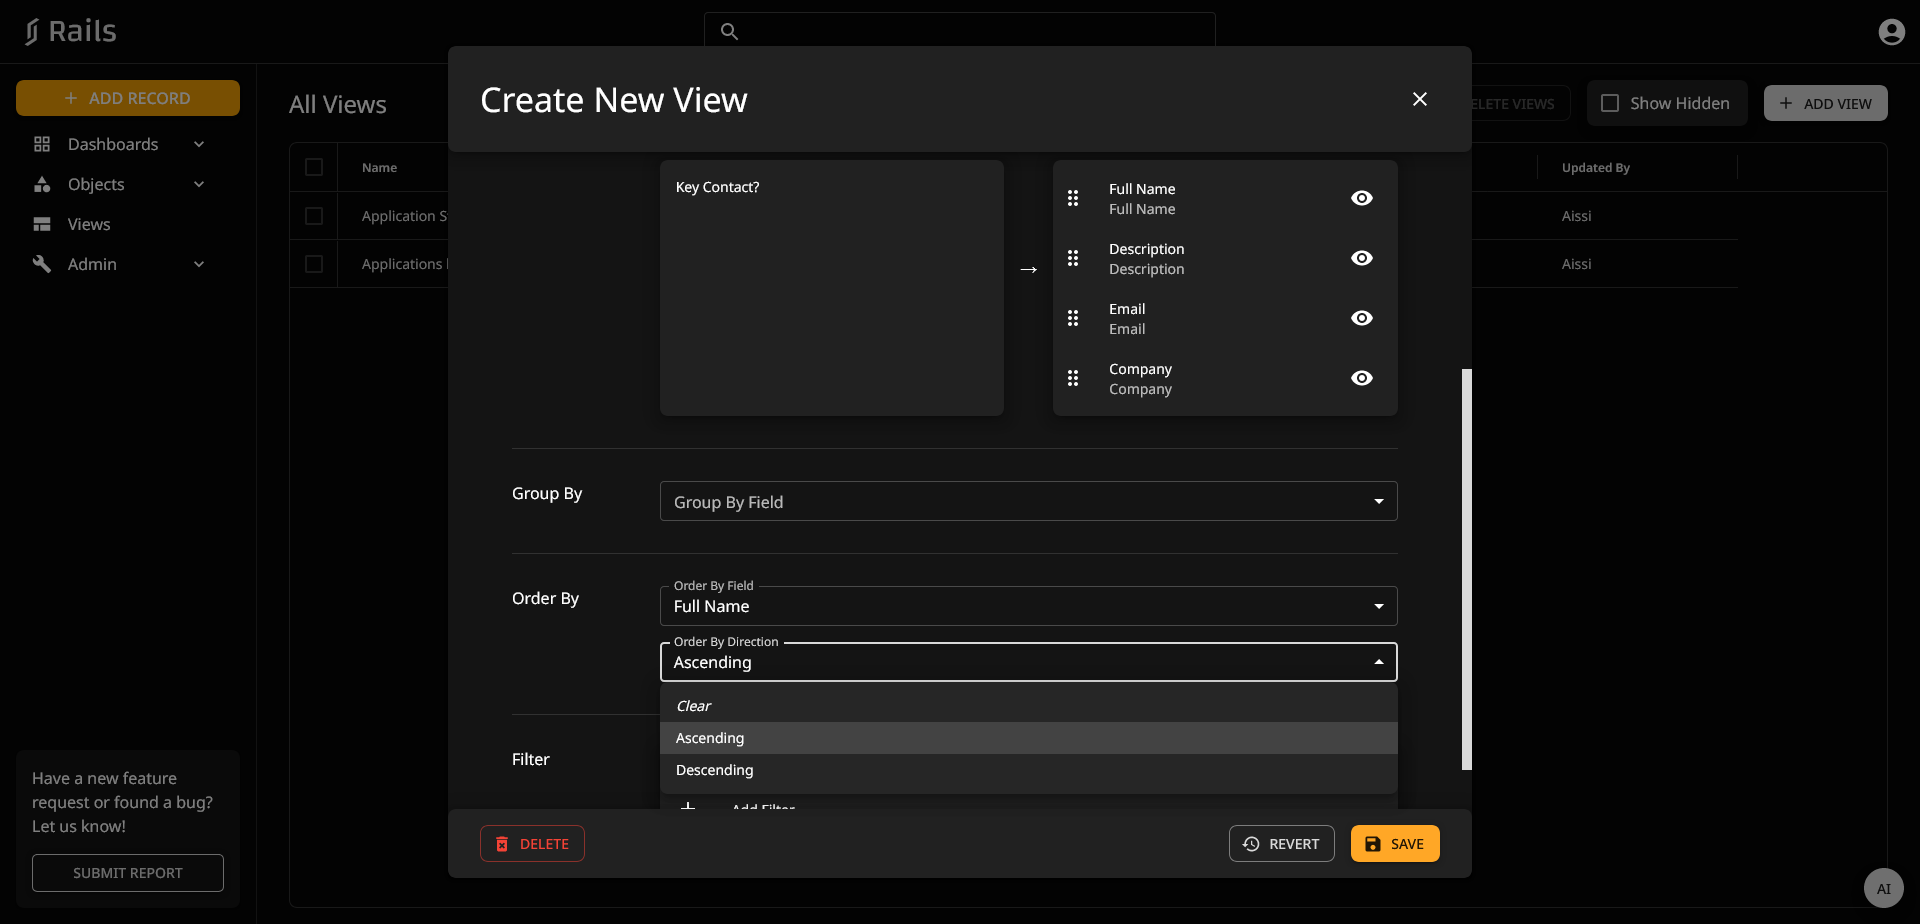
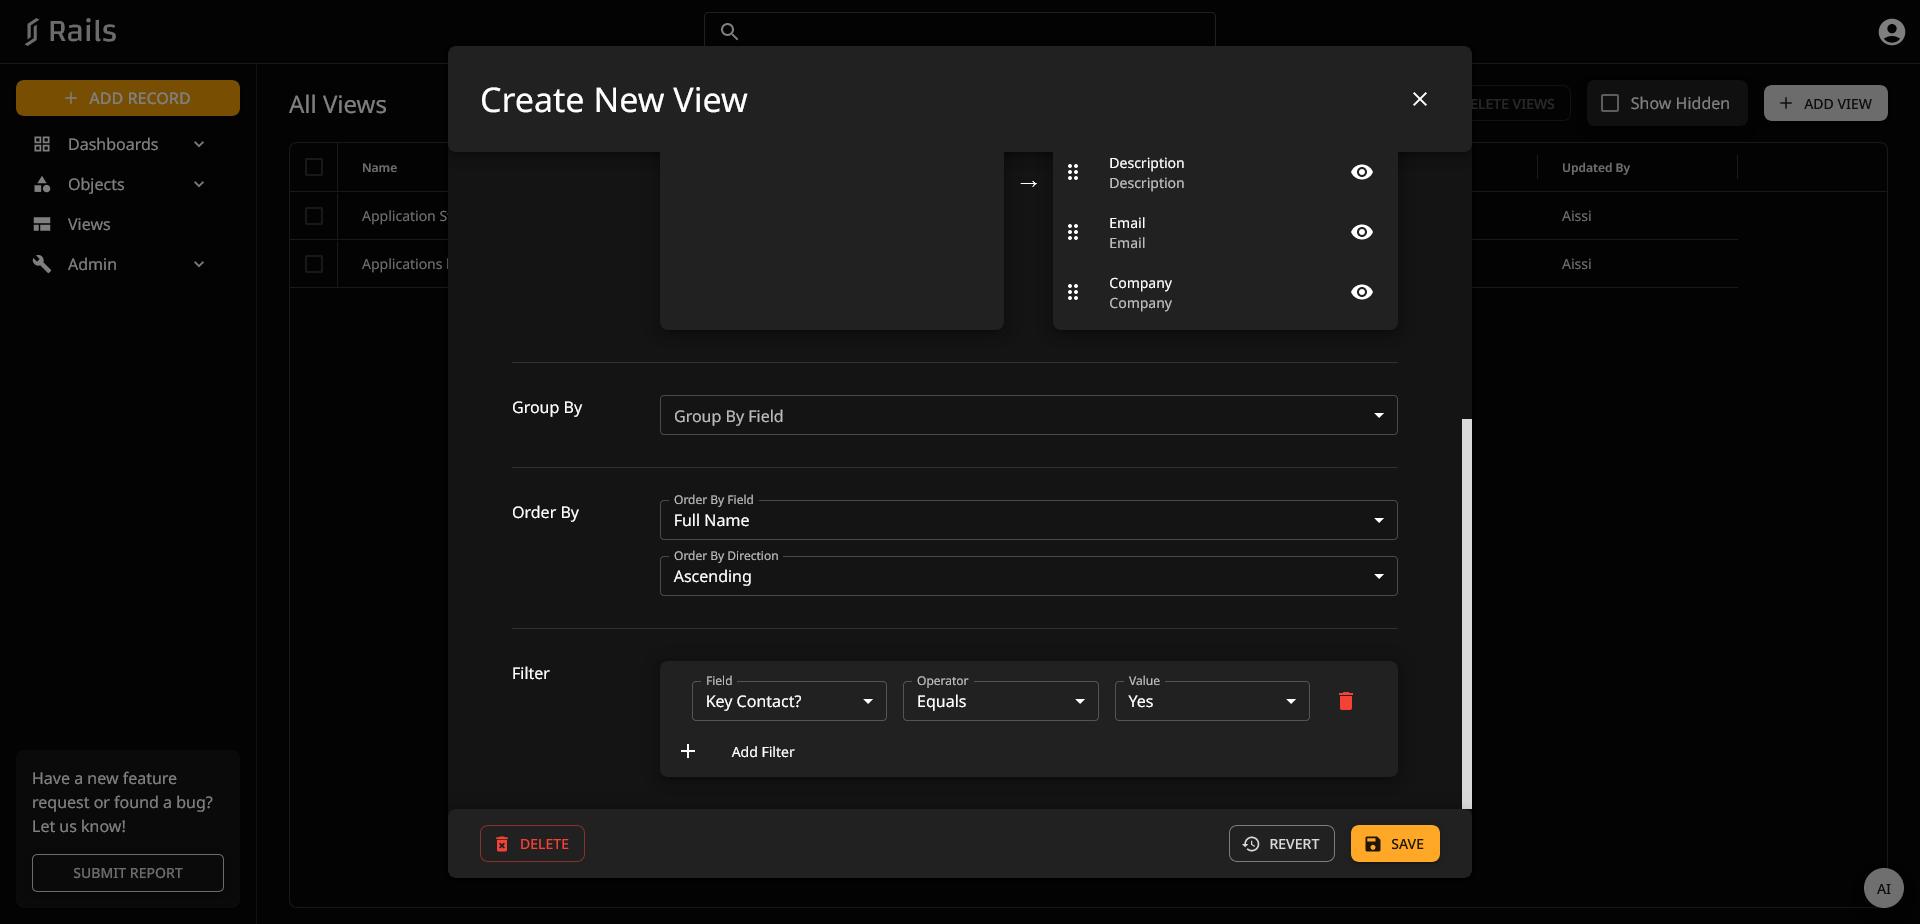
For custom ordering, click onto the Order By Field selection and choose which field you'd like to sort your entries by. Then choose if you'd like that field to be sorted by Ascending, or Descending order as seen below:

<figure><img src="https://878880083-files.gitbook.io/~/files/v0/b/gitbook-x-prod.appspot.com/o/spaces%2FAIm7gKD7NLcZxCtbrbmz%2Fuploads%2Fs0Y8bfzKN9znFivlMSyp%2FScreenshot%202024-08-05%20at%2018-17-08%20Rails.png?alt=media&#x26;token=80926e81-f79d-409c-b39a-a497066d58b2" alt=""><figcaption><p>Ascending/Descending Order</p></figcaption></figure>

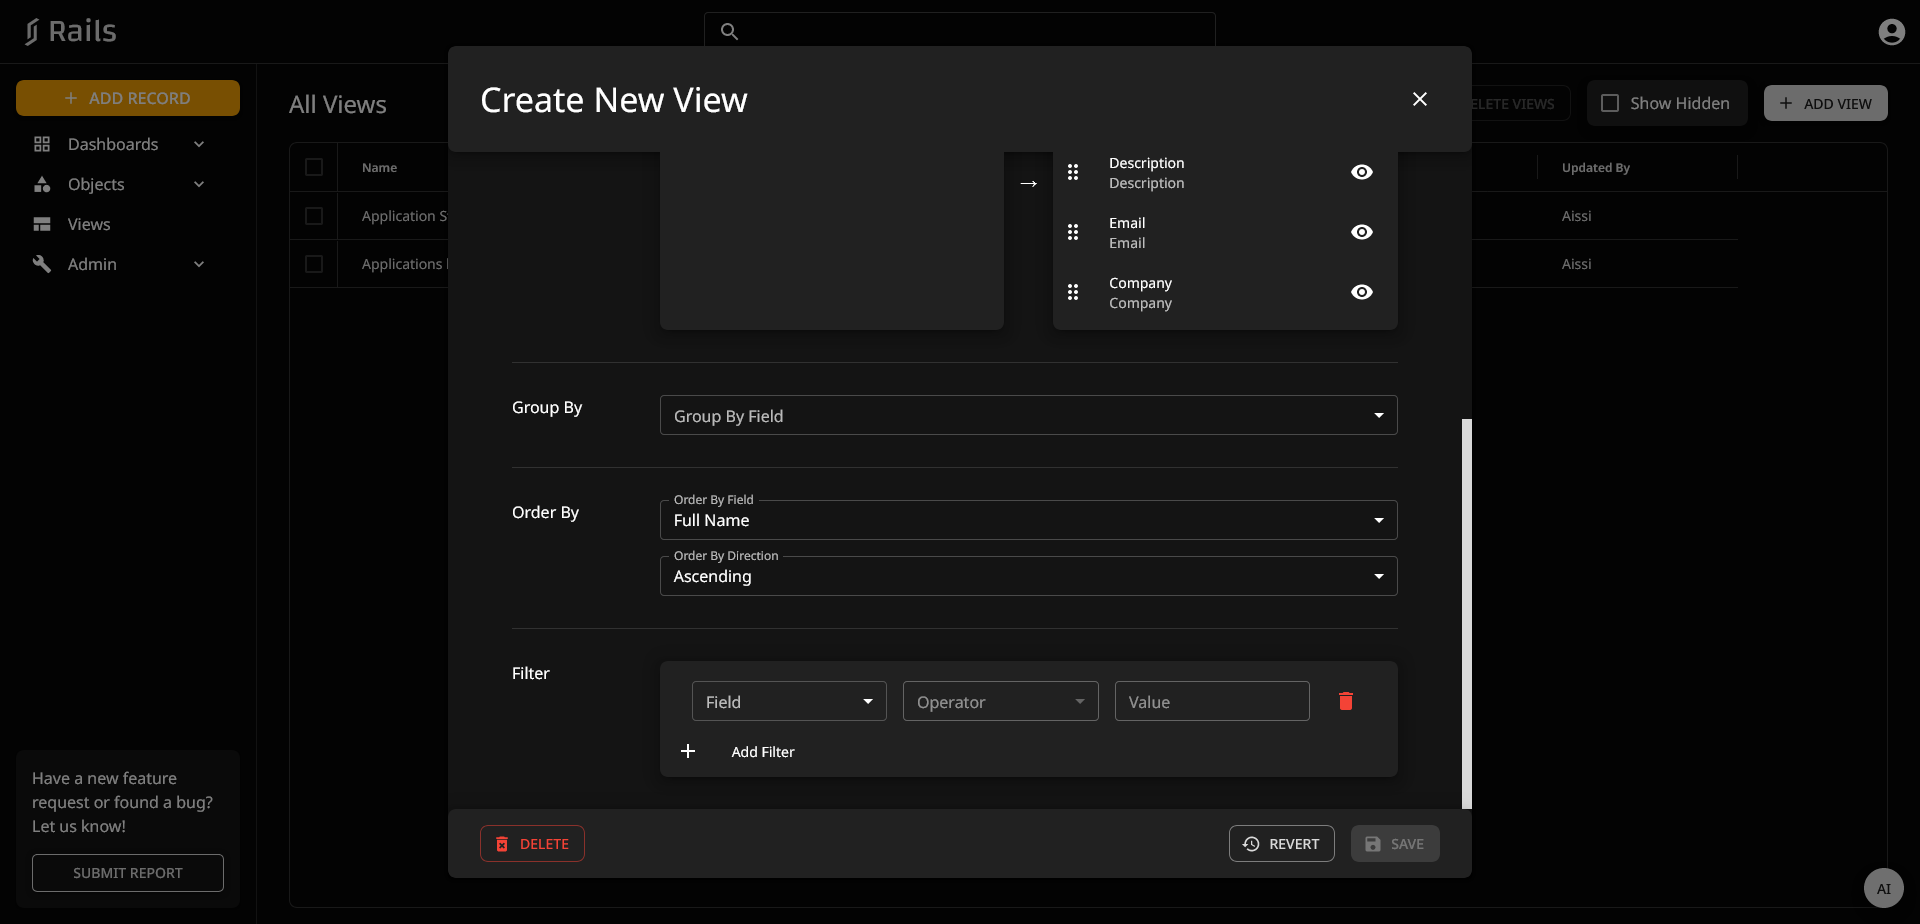
Lastly, we can choose to apply filters to limit our selection. To do so, scroll down the the Filter section and press the Add Filter button.&#x20;

Once you've done so, you should see the below options:

<figure><img src="https://878880083-files.gitbook.io/~/files/v0/b/gitbook-x-prod.appspot.com/o/spaces%2FAIm7gKD7NLcZxCtbrbmz%2Fuploads%2F9R78iesLo3bxZnDf4H9x%2FScreenshot%202024-08-05%20at%2018-19-43%20Rails.png?alt=media&#x26;token=f85c3f95-3c6b-4f26-8986-f034d1eb50a9" alt=""><figcaption><p>Filtering Navingation</p></figcaption></figure>

For our example here, lets choose to only show Contacts where the Field called 'Key Contact?' is labeled as Yes.&#x20;

To do this, I'd select the 'Key Contact?' Field under the filter navigation.&#x20;

Then under the operator, select Equals to ensure that this field equals whichever value we select.&#x20;

Lastly, click into Value and select 'Yes', or whichever value you'd like to set the filter to.&#x20;

After doing so, the Filter will look as follows:

<figure><img src="https://878880083-files.gitbook.io/~/files/v0/b/gitbook-x-prod.appspot.com/o/spaces%2FAIm7gKD7NLcZxCtbrbmz%2Fuploads%2FvFSKXtJteQtn00S2j1z7%2FScreenshot%202024-08-05%20at%2018-24-46%20Rails.png?alt=media&#x26;token=e6335607-aaa4-4682-8281-38a0ca75645b" alt=""><figcaption><p>Added Filters</p></figcaption></figure>

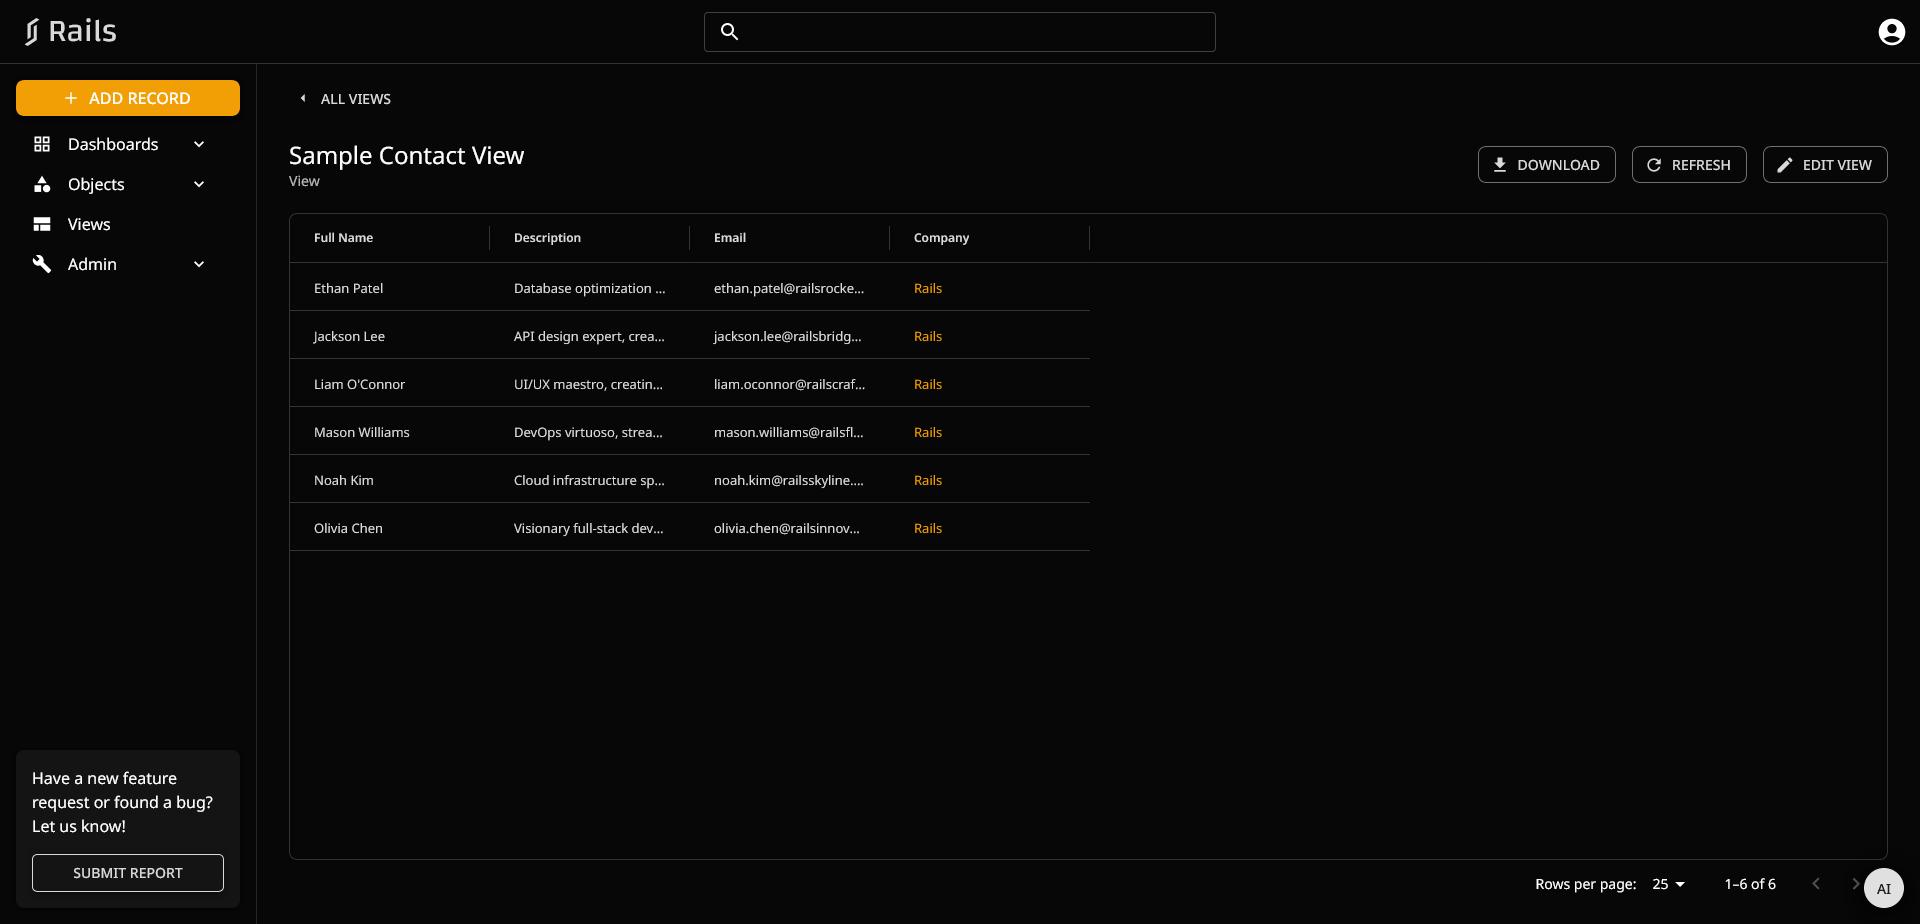
Feel free to add any additional filters you see fit.

After completing this, press Save. After completion, you can now click onto the newly created view to see a table similar to the following:

<figure><img src="https://878880083-files.gitbook.io/~/files/v0/b/gitbook-x-prod.appspot.com/o/spaces%2FAIm7gKD7NLcZxCtbrbmz%2Fuploads%2FVmhvdDjaAEAxtBCqk4Bl%2FScreenshot%202024-08-06%20at%2015-16-39%20Rails.png?alt=media&#x26;token=7abba9e0-7705-46da-9770-bd5ebee975e2" alt=""><figcaption><p>Sample View</p></figcaption></figure>
